
 Top Tips for Senior Travelers at Airports – Easy, Safe, Stress-Free Journeys" >
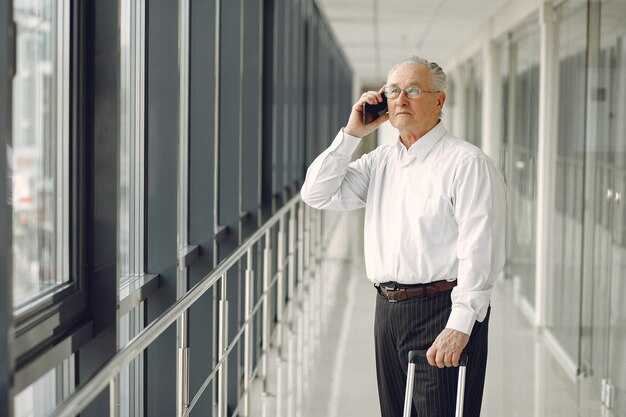
This approach allows you to reach departure checkpoints with ample rest and breathing room; it also helps you move through security and corridors with less strain. A helper or wheelchair service can be requested when booking or via the airline’s assistive desk; doing so sets the timing and ensures a smoother flow. In zurich, staff often guide travelers along labeled routes toward the correct security line, which minimizes walking and waiting and helps you gain quick access to your boarding area.
Before the trip, review the airline guidelines and the online faqs a notes about assistance. The issuance of a mobility certificate or seating accommodation can be requested during booking or at least 72 hours ahead; it helps staff arrange a liaison with the airline and airport. If you use third-party services, verify credentials and expected timing, because availability varies by airport; in zurich, important routes are clearly signed so you can choose the shorter path than alternatives.
Plan your day with clear steps: check-in, security, and boarding. Ask for priority lanes and present eligibility at the entrance; staff confirms access and can promptly update you about any gate changes. Keep a simple notes sheet listing gate numbers, escalator locations, and seating zones to reduce wandering between hubs.
Coordinate a liaison between airline representatives and airport staff so that a flexible routes plan is available if a transfer becomes tight. Rely on the airport’s notes and the social support network you bring or that is offered by the carrier; guidelines encourage using a single point of contact for timely updates promptly.
Carry a compact folder with essential notes and copies of medical documentation; this reduces questions at security and helps with the issuance of special access. By prioritizing simple steps and sticking to the least demanding options, you can move through the system with confidence; every detail matters, and access to lounges or priority gates becomes routine rather than exceptional.
Practical guidance for baggage handling and IST terminal transfers
Label a pouch with your identified IDs, booking reference, and on-site contact numbers to speed collection and transfers at the first belt, making the experience calmer and stress-free.
- For both international and domestic segments, follow signage to the designated baggage collection area; if your bag isn’t identified on the belt, request assistance from a staffed desk nearby.
- If you have a second bag, keep it with the primary bag and attach the same tag to ease identification; once you see your items, collect them promptly to avoid blocking the line.
- Mobility aids: on-site aids such as scooters and wheelchairs are available; the equipment used is standardized; contact the first staffed desk to arrange assistance and avoid extra fatigue.
- Organize carry-ons and small items into a dedicated pouch before reaching screening; this reduces fumbling and speeds up the process.
- Wayfinding and corridors: use quiet routes with clear signage to minimize anxiety and provide an advantage for faster movement between belt, transfer desk, and gates.
- Coordination with staff: ensure luggage handlers, security screening, and transfer desks are aligned; staff provide direct contact to the customer and confirm item status to avoid misplacement.
- For first-time passengers: keep essential items in an easily reachable pouch and use the on-site contact line for any changes.
- Post-pickup check: verify all items at the collection point and proceed around via arrival corridors toward your next transfer; if something is missing, contact a desk immediately.
Pre-trip packing and clear baggage labeling to speed checks and handling
Enable faster checks with a full packing system: attach a durable badge to each bag and tuck a compact reference card inside that lists owner name and destination. This setup clarifies handling points for staff, speeds through the first screening, and optimizes the processes at the gate.
Prepare a dedicated carry kit for accessibility and comfort: include a charged phone, portable charger, spare shoes, a lightweight sweater, medications, and a printed list of needed items for loved ones waiting in lounges. Use a bright color tag to indicate priority so partners and guests can locate essentials quickly.
Label strategy: outer and inner surfaces should show clear owner data and a reference number. Indicate full name, phone, and destination, plus a form-like tag that guides staff to the correct belt at the point of inspection. A badge on the handle speeds recognition by baggage handlers, reducing misroutes for guests and partners alike.
Seasonal changes require flexible packing: rotate clothing, place seasonal footwear in a separate bag, and keep a compact cleaning kit handy. For комфортного travel, include a breathable layer and an umbrella; keep the buggy covered and labeled to speed handling on floors near lounges, helping accessibility and comfort for guests with mobility needs.
Prepare a concise checklist on your phone and a printable form to share with partners and caregivers. This approach will enable quicker checks and a perfect balance between speed and reliability, enabling more routes to pass through checkpoints with less friction. If changes occur, update the reference sheet immediately so processes stay aligned and march toward the gate without disruption.
Streamlined check-in and security steps tailored for seniors
Do online check-in 24 hours prior, request assigned assistance to guide you through the process; this minimizes anxiety, helps them feel welcomed with a warm greeting from staff, and keeps you on a predictable path within the terminal.
Prepare documents in a single sleeve: passport or ID, boarding pass, medical info, and emergency contacts; keep a small list in your pocket to speed checks, adding preparation notes.
At security, ask about availability of dedicated lanes or assistance; if needed, use wheelchair or walking aid; keep electronics in an easily accessible pocket; remove belts, coins, and keys before reaching the belt to promptly move through.
Pack limited items in your carry-on to reduce handling time; place fluids in a single clear bag; keep essential medicines in a small pouch to minimize rummaging.
Arrival planning matters: arrange curbside drop-off or gate-assist to guide you through the building; elevators help speed transitions, while quiet corridors reduce nervous energy.
Families can travel with a single designated escort; assigned staff can greet you on arrival and lead you to baggage claim; robson services also offer a companion to assist passengers needing extra help.
robson teams operate at major hubs, ensuring availability of greeters, wheelchair operators, and seating; numbers vary with seasons, options differ by terminal layout.
Numbers to note: typical check-in wait times 5–15 minutes on weekdays, security lines 10–25 minutes during peak seasons; always aim to arrive 2–3 hours before departure.
Another practical step: download airport maps offline; know an assigned meeting point; this helps minimize confusion.
Transfer options at IST: planning routes, gates, and buffer times
Start with a single route plan backed by printed maps located near information desks. There, staff can confirm directions and flight numbers, and a quick call helps keep plans aligned with live updates.
Buffer times depend on seasons. International connections typically require 90–120 minutes; domestic connections 60–90 minutes. In peak periods, add 15–30 extra minutes to cover security and immigration flows. Plan to move between gates efficiently; a longer buffer keeps everything predictable and reduces stress.
Use clear directions on boarding documents, and follow visible overhead signs. If changes occur, call the provider’s helpdesk using the numbers in faqs. The professionalism of on-site staff ensures smooth gate transitions and timely departures. When distances are longer, a short ride via internal connectors keeps you moving efficiently.
For longer layovers, stay handy near the main concourse. There are lounges, quick bites, and rest areas near gates; use an extra buffer to minimize walking. If mobility is limited, staying inside the terminal keeps the process predictable and speeds up transfers.
Pack comfortable shoes and keep a printed list of connections accessible. Wear shoes you can move in; bring a handheld charger and water. Keep everything within reach, including boarding passes and ID. There, you can shift priorities quickly if needed.
Check faqs on the provider site, and ask there if anything remains unclear. If you need real-time guidance, call the help line. What you learn online helps you act with confidence during a tight connection.
There is a dedicated group called “ists” at information desks to assist with route tweaks, gate updates, and plan adjustments.
| Transfer option | Estimated time | Best use | How to use |
|---|---|---|---|
| Airside transfer (same terminal, between gates) | 60–90 minutes | When gates sit in close proximity within the same module | Follow posted directions, use printed map, monitor visible signage |
| Shuttle/connecting transport (internal provider) | 15–40 minutes | When piers are spread apart or during busy periods | Book via provider, call ahead, board at designated stops |
| Assisted transfer (staff support) | 20–60 minutes | Mobility constraints or tight after-arrival schedules | Request via company, present your plans, follow directions |
| Long layover strategy (keep inside terminal) | 120–180 minutes | Maximize time without exiting security checks | Plan with printed plans, explore near-gate options, stay near high-visibility areas |
Assistance, accessibility, and requesting support at IST
Go to the IST information desk in the arrivals hall to obtain real-time assistance and a mobility plan aligned with your destination. Request a designated assistant and a badge issuance to accompany you through halls, gates, and hubs, with names listed on your service request so the team can recognize you quickly.
Ask the agent to provide maps of the terminal, clear sign guidance, and a quiet route that minimizes delays. The process is quick; assistants use real-time updates to adjust routes if changes occur, and they can coordinate with companions or escorts if needed.
Details such as location of desks, schedule of available assistants, and sign positions are provided at issuance. If your needs include wheelchair mobility, hearing support, or visual aids, specify this at the start so staff can shape a suitable plan and assign the appropriate assistants.
Costs, if any, are disclosed at issuance and can be supplemented via approved channels; thus you know what to expect before movement.
During transit, the service continues inside different hubs, with the team ensuring a smooth handoff between halls and service points. Your destination is confirmed by the badge name, with real-time updates visible on the companion’s device; companions can join at the hall entrance or a designated meeting point, and the location of the assistant is always indicated on a maps display. If you need changes in your schedule, contact the hall team; they will adjust quickly and notify you via direct alerts from the service system.
Comfort during layovers: seating, rest zones, and simple navigation between terminals
Start by selecting a nearby rest zone within minutes of arrival to quickly decompress and set a steady pace toward the next connection. Availability varies, so check the airport app or on-site maps to locate seats that are quiet, comfortable, and convenient.
- Seat and rest area selection
- Choose zones with padded seating, armrests, and low noise; aim for spaces near walls or corners for added privacy above the bustle.
- Prefer chairs with power outlets and accessible seating to stay charged and comfortable during longer waits; premium lounges offer more room and private nooks.
- Rotate seating area every 30–60 minutes to reduce fatigue and yield fresh views of gates and screens.
- Rest zones and private spaces
- Use quiet zones for short naps or reading; private pods provide minimal distractions and a space to regroup.
- Caregivers can request assistance to reserve seats near access points or elevators; this coordinated support helps travelers and flyers manage fatigue.
- Navigation between terminals: simple, coordinated routes
- Follow multilingual signage and on-screen maps; above each route, arrows point to elevators, escalators, and moving walkways to enable easy transit.
- Use step-by-step instructions to reach the correct transfer corridor; keep an eye on critical updates about gate changes.
- Among routes, choose the most convenient path to minimize walking and maximize rest opportunities. Signage covers multiple areas, including transfer corridors and rest areas.
- Premium options and private areas
- If budget allows, access premium lounges for more space, comfortable seating, and quiet areas; these spaces yield a more restful wait and may include private rooms.
- On-site lounges can accommodate caregivers and Flyers with accessibility needs; verify day-pass options or membership.
- Mobility and rides between terminals
- Use elevator connections and moving walkways to move quickly between levels; when distances grow, consider a ride service within the airport.
- Keep updated with updates via airport app to track route changes as you move among terminals.
- Communication, coordination, and medication management
- Maintaining clear communication with staff reduces delays; staff coordinating with caregivers and specialists (ists) to support mobility or medical needs.
- Carry medications in a labeled bag and have quick-reference instruction sheets in multilingual formats; on-site pharmacies or medical stations can assist if needed; critical reminders help ensure timely dosing.
- Processes governing assistance, seating reservation, and areas usage are designed to accommodate a range of needs and are updated regularly.


")

