

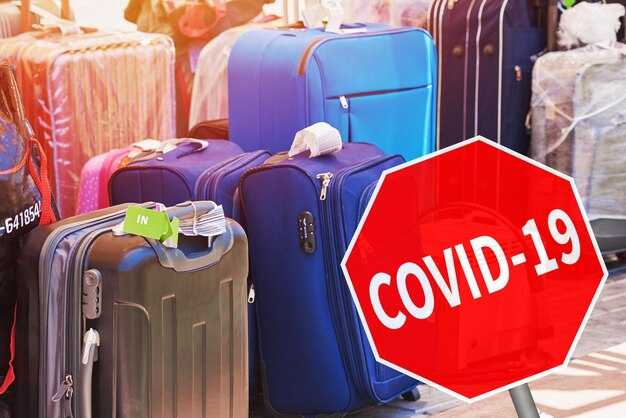
Before you pack, review the regulations that govern liquids, gels, and aerosols to avoid delays at the security checkpoint. For cruises or a stay in hotels, the limits can differ by region, so focus on what you will carry in your hand luggage and what you will pack in checked bags. Explore the official pages of airlines, airports, and border authorities to find the exact numbers and the details you need.
Where to start? The most reliable sources are the official regulator pages, airline FAQs, and the cruise line’s own pages. For example, if your arrival is in a region that operates under EU or US standards, the limit is the same per container but the bagging rules may vary by carrier. Since these rules update, check time of travel and recheck a few days before departure. If you are staying in hotels after your arrival, you can keep larger liquids in the hotel room, which gives you more flexibility for your stay.
For cruises, ask the line whether duty-free purchases on board can be carried ashore or if you must recheck volumes at each port. For a beach break, pack your liquids according to the airport standard, and note that some countries enforce stricter rules at arrival. The region you visit may require you to have labels on containers in English and the local language, which helps when you present details to security or customs.
Plan a practical checklist: have a travel bag with up to 1 liter of capacity for the clear bag, ensure each container is up to 100 ml, place items in a transparent pouch, and transfer any not allowed to checked baggage. When packing, keep necessary medicines and baby formula separate, as these often have different allowances. Explore the steps you need for time of arrival at your destination and how this affects your stay in hotels or beach locations. If you have been on long trips, you know that keeping these details organized saves time and reduces stress.
New Regulations and Travel Information: Liquid Restrictions, Terminal Services, and More
Carry liquids in containers of 100 ml or less and place them in a single transparent bag of 1 liter or less before you reach the checkpoint; have your passport ready and present both with your boarding pass if asked; this setup offers a taste of streamlined travel and is a recommended approach.
Advance planning helps: check the listed restrictions for your departure and destination states, Türkiye, which may vary by terminal and carrier. Keep medicines and baby formula in their original packaging and declare them if necessary; carry enough supplies for the journey and avoid carrying excess liquids in your carry-on. The below rules are indicative and applied consistently across most major hubs, though local procedures vary. Some systems display Türkiye as türkiye. Some items require extra screening or documentation.
Liquid requirements and packing tips
Key rules are explicit: containers 100 ml max, total volume not to exceed 1 liter, and the bag should be transparent and resealable. At the checkpoint, remove the bag and place it in a tray separate from electronics; you may keep essential items in your pocket for quick access. Prepare in advance so you won’t miss a transfer or a train connection.
| Item | Requirement |
|---|---|
| Carry-on liquids | Containers 100 ml max; all items in one clear bag; total volume 1 liter; present at checkpoint with passport. |
| Meds and baby formula | Keep in original packaging; declare if requested; carry reasonable quantities. |
| Duty-free liquids | Allowed after security if kept in sealed bag with receipt; may require presentation at connecting checkpoints. |
| Checked luggage | Not subject to carry-on liquid limits; pack securely and label fragile items. |
Terminal services and assistance
Check the services listed below at your terminal: lounges, showers, charging stations, accessible restrooms, assistance desks, and other helpful places. Helper attendants are on duty to expedite screening and provide directions. Terminal staff can arrange wheelchair access and expedited screening for disabled travelers, with support from the airport company if needed. For travelers with timeshares near the hub or during long layovers, airline lounges offer a comfortable option to rest and refresh while you keep your passport handy and stay informed about your train or flight times. Traveling through busy hubs becomes easier with these options.
New Liquids Regulations: Carry-On Limits, Labeling, and Exemptions
Follow the 100 ml per container limit and pack all liquids in a single transparent, resealable 1-liter bag; at checkpoint, present the bag separately for screening. Therefore, you gain faster access and reduce the chance that items are damaged or discarded from your belongings. This approach is indicative of standard security practice across united travel hubs yesterday and today.
Label each item with its name and exact volume; the labeling helps police and security staff verify liquids quickly, saving hours in line. If you travel with medicines or baby formula, keep the original packaging and a prescription or doctor’s note; you may carry these liquids without counting toward the limit when declared at the checkpoint.
Practical packing and labeling steps
As you prepare, place all liquids in the single bag, seal it, and store it in an outer pocket of your belongings for quick access at the checkpoint. Think about your trip length: for a short hop, one bag usually suffices; for traveling with an internship or longer journeys, pack a few travel-sized bottles and keep them within the limit. If you plan to bring water, ensure bottles stay within the limit; water bought after security is allowed separately, and you can refill at a fountain once you’re within the terminal.
Keep your passport and travel belongings ready; if doubts arise, call security staff at the checkpoint rather than leaving belongings unattended. If a bottle is damaged, swap it for a fresh container before you reach the bag check to avoid delays.
Exemptions and travel tips
Exempt liquids include medically necessary items, baby foods, and formulas when you declare them and present supporting documentation. Always check rules for your destination because united authorities may have different thresholds for certain items. For medications, carry only what you need for the trip and bring a prescription bottle with the label readable. Remember that prices for travel-size bottles vary; buying several compact bottles can reduce bulk and help you stay within the limit.
When heading toward a beach or outdoor event, plan which items you’ll need and which can be purchased after landing; this helps you avoid overpacking and ensures access to free water outside the security zone. If you travel yesterday, double-check your bags at home to avoid last-minute checks and ensure a smooth process from the checkpoint to boarding, and keep belongings leak-free to prevent damage and fines.
Lost Items in the Terminal: Where to Report, Find, and Retrieve
Report missing items to the airport Lost & Found desk in the arrivals area immediately; this keeps the process clear and increases your chances of recovery which you locate inside the terminal. Use the electronic form or the airport apps to log the report, and follow up with a written description of the item, including distinctive marks or labels.
Have ready: item type (baggage, accessory, electronics), color, brand, size, approximate location in the terminal, and flight details such as airline and arrival time. If you can, include the baggage tag number and a photo; these details listed in the report help staff match items quickly. For travelers with disabilities, ask for assistance during reporting to ensure support is provided. If the item contains sharp parts, expect safety checks and separate handling by security teams.
Most airports store found items for a defined period, with policies varying by region and airport. In general, small items are kept for a few weeks, while larger baggage may stay longer, and historic travel documents may require special handling. Check the province or region policies online or via the airport’s information desk to know the exact timeframe.
If you are traveling abroad, use the airline’s forum or aviation forums to see recent tips, but rely on official channels for recovery. Do not share sensitive data in forums; only use official channels to avoid scams. When you file a report, you will receive a reference number that you can use to track the item through the internal process.
Where to look for items after reporting: Lost & Found offices inside the terminal, airline counters, or the central information desk; some airports also list recovered items on the app or through the electronic portal. If the item is located, you will be notified by a staff member, and you can pick it up in person or arrange delivery through the airport’s policies. Bring valid ID and the reference number; for some items, you may need to sign a written receipt before release.
Reporting Steps
Visit the information desk or Lost & Found in the arrivals zone to start a log. Submit a written description via the airport’s electronic form or apps, and attach a photo if available. Include which item it is, where you last had it, and when you noticed the loss. Keep the reference number and monitor official channels for updates.
Retrieval Steps
Provide ID and the reference number when you arrive to claim a found item. Confirm ownership with a description that matches the report, and be prepared to sign a receipt. If security concerns arise over a contained item, staff will handle it through the appropriate process and advise on next steps. If pickup isn’t possible, coordinate delivery according to local policies, noting any regional or provincial restrictions.
Water Fountains: Locations, Accessibility, and Hydration Etiquette
Accessibility and Locations
Always carry a sealed bottle and refill directly at fountain stations to stay hydrated during travel. Use fountains to top up liquids you cannot carry in bulk, while keeping liquids within country rules. Check the airport company website for fountain locations in the terminal, lounge, and near transfers, and note there are some stations shown in written signage with hours below each map.
Locations vary by country and city. In most airports, you find fountains near security, after the terminal entrance, or inside lounges. Some fountains are listed on the website or posted as written signage; look directly at the signs for hours and access rules. If you travel via transfers, head to the next terminal or lounge to refill, rather than carrying liquids through multiple checks. In fethiye, for example, fountains appear in domestic terminals near baggage claim and in the city’s main transit lounge. Since some stations shut down after hours, verify hours on the terminal display before you go.
Hydration Etiquette and Safety
Hydration etiquette means use fountains when appropriate and avoid inappropriate actions. Have your passport ready if staff ask for identity at a fountain station during transfers. Never pour from one bottle into another at the fountain; keep bottles sealed while filling. Respect the no-fill zones, the surroundings, and the sharp edges on some nozzles. Wait for space, give others a turn, and keep the area clean; wipe spills with the provided towels and carry on. The subject of access may vary by location, so stay aware that some places require a quick check of your travel documents. The complete guidelines are written and posted nearby to help each person stay comfortable and compliant. After you finish, replace the cap and return the bottle to your bag, or place it in the lounge area if you’re heading there next. Domestic stations often share the same etiquette rules as international hubs, so plan ahead when you travel between domestic airports and international gates.
Security Procedures: Checkpoint Steps, Prohibited Items, and Packing Tips
Pack liquids in containers no larger than 100 ml, seal them in a clear, resealable bag, and place that bag in the bin directly before the x-ray machine; have your passport or ID, a valid visa if required for Türkiye, and your electronic ticket ready, because these documents are checked before you reach the terminal.
Checkpoint Steps
- Before you reach security, separate electronics (laptops, tablets) and place them in a bin; remove belts and large metal items.
- Present your documents to security staff: passport/ID, visa if required, and boarding pass or ticket; there are pages with airline and airport policies you should review before travel.
- For liquids, place the clear bag in a bin and keep it accessible; remove any sharp objects from pockets and place them in the bin as well.
- Walk through the scanner or metal detector as directed; if a secondary screening is requested, follow the staff instructions and stay nearby.
- Collect all belongings on the opposite side, reassemble when clear, and move toward the terminal or check-in area.
Prohibited Items and Packing Tips
- Prohibited items: weapons, sharp objects without proper sheathing, flammable liquids, and any item that could be deemed inappropriate by security staff; these must not go in carry-on bags.
- Liquids and gels: keep containers to 100 ml or less; place all containers in a single clear bag and present it at screening. Certain medications and specialty items may have exceptions, but you should carry supporting documents.
- Packing tips: pack fragile items in the middle of the suitcase, use padding, and avoid overpacking so items don’t create alarms at the scanner; use a dedicated dispenser for liquids to minimize leaks.
- Dispenser and electronics: carry a compact dispenser for toiletries to reduce bulky bottles; keep electronic devices easily accessible for quick removal at the checkpoint.
- Travel reminders: check-in timing and airport hours; at Izmir Adnan Menderes Airport (Menderes), expect security checks to be near the ground transport area, and follow posted signs located near the terminal entrances.
- Policies and reference: review the official pages of your airline and airport for current rules; the source (источник) for many guidelines remains the airline’s security page and country-specific regulations.
Parking and Transportation: Directions, Rates, and Terminal Access
Just follow these steps: use the official airport apps to compare rates and complete a reservation before arrival. This saves time at the gate and guarantees a space near the terminal you plan to use. The apps show current fees, length of stay options, and final charges, and you can place the purchase in one place for easy access on arrival. You can explore these options in the app to tailor a plan.
Directions and terminal access: On arrival, follow the signs to the Parking and Transportation hub. The Garage, Economy Lot, and Premium spaces connect to the terminal via covered walkways and a short shuttle. If you are carrying baggage, use curbside lanes for drop-off and then head to the designated parking area. Exit with your valid ticket; payment can be processed at the on-site machine or via the apps. The official pages and the app details explain routes and travel times, which may change with regulations. Places shown on the pages indicate where to head for departures, arrivals, and baggage services.
Rates and options: Short-Term Garage up to 30 minutes $8; 31–60 minutes $12; each additional 30 minutes $6; daily max $45. Economy/Long-Term Lot $18 per day. Premium Covered Parking $28 per day. Valet service $50–$70 per day depending on window. Rates posted yesterday may vary by location; check the pages or apps for current numbers and any discounts.
Using Apps and Machines to Complete Your Purchase
Open the app, select Parking, choose a duration, and confirm. You will receive a digital ticket or QR code; present it at entry and on exit. On-site machines accept cards and contactless payments; keep your ticket placed in a secure spot until you leave. If plans change, cancel or modify in the app before the final charge is posted to avoid extra fees.
Accessibility and Assistance at the Terminal
Disabilities support desks are located on the arrivals level and near major information centers. If you are carrying a mobility device or require a wheelchair, request assistance via the app or by calling the duty desk on arrival. Staff are on duty to escort you to the terminal, security checkpoints, or your gate. If baggage is lost, call the lost baggage desk or use the assistance pages to file a report; guidance is available at the information desks. For fastest routes, follow green signs to the baggage claim and departures, and refer to the distance estimates shown on the pages of the official site.
Customs Procedures and Baggage Services for Transit and Arriving Passengers

A recommended, detailed practice is to keep two copies of the customs declaration pages and have your passport and boarding pass ready; this will speed check-in and service at the desks. Following these best practices reduces hold times and helps you stay oriented throughout the process.
Transit passengers: baggage handling and procedures
- Before you reach the transfer area, confirm whether your baggage is through-checked to the final destination; if not, visit the airline desk to request a re-check for each bag.
- Follow clear signs to the baggage transfer area; if a bag is missing, report it as lost and provide your tracking number; you will receive a reference number to check the status.
- If an item is damaged, file a damaged-baggage report at the desk and ask for the appropriate form; this will help you recover the cost or arrange replacement.
- Keep essential items with you and separate any items that require special handling; some stores in the transit zone offer essential items, and the service desk can assist with needs like medical equipment.
- Acknowledge that some items may be inappropriate for transit; police involvement may occur if violations are detected; staff will guide you on next steps.
- For large items or routes with timeshares or shared accommodations, arrange special handling in advance with the airline.
- If your flight originates in Fethiye or other regional hubs, expect additional checks; ask staff for the most detailed instructions, including translations if needed.
- Internship programs at airports may provide guidance desks; students can learn how baggage procedures operate and what documents matter in practice.
- Some transfers require you to present receipts; the desk will explain what is needed and how to proceed.
Arriving passengers: customs and baggage clearance
- On arrival, proceed to customs with your passport, the declared pages, and any receipts; this subject area directs you where to go and into the inspection zone.
- Check the duty allowances and declare items when required; accepted items are listed on the duty table near the customs desk, and any tax will be calculated at the desk.
- If baggage is lost or damaged on arrival, report immediately to the baggage desk; the staff will give you a claim number and outline the process for recovery.
- Keep travel documents, receipts, and the bag tag together; this helps you check progress and speeds up the check if you have multiple transfers.
- After clearance, collect bags on the indicated carousel; if you cannot locate a bag, ask service staff for assistance and a locate check.
- Explore local services, including stores and duty-free shops; some arrivals coordinate with timeshares or hotel shuttles for onward travel.
- Yesterday’s updates may change some steps; always verify the latest guidance at the arrival hall information desk.
Passenger Services, FAQs, General Flight Information, Hotels in Fethiye, and Career Opportunities
Flight Information and Passenger Services
Hotels in Fethiye and Career Opportunities


